Twilight Color Palette

I've been inspired lately when walking through the garden, or standing under the oak tree, in those last moments before night truly sets in. The air, the trees, everything takes on an ethereal quality. The world turns blue in that last moment of dusk. Have you ever noticed how, as the sun sets, and dusk settles, there are stages of twilight?

The sunset blazes, the world is orange, yellow, purple and pink.

The sun sinks just behind the horizon, the sky is still ablaze, but the ground is colored with muted violet.

Then, in that last breath between night and day, the sun's light has faded from the sky, but misty blues and greens mixed with deep shadows and accents of moonlit white seem to spring up from the earth itself. Even your skin takes on a bluish cast. If magic exists, it happens in this moment.


I've created this fabric color palette for the Dreaming at Dusk mosaic contest at Stitched in Color. Head over to create your own palette and view the other gorgeous palettes and inspiration.


To all the gross chairs

To Jenna at ColdAntler Farm,

This post resounds with me. I too, have hand-me-down overly used furniture. My furniture tells a different tale. The giant, once nice, but not my style, burgundy sectional sofa was a castoff from a family who probably has more money than sense. It was, however, generously offered and graciously received. There were a few small tears in the back, but not bad. After nearly two years in the the TLC of my three young boys, I found myself today thelling them to put giant wads of stuffing back into the couch and that it was not to be used as pretend snow for their blanket igloos.

My choices are reflected in that sofa too. I chose to be a stay at home, homeschooling, kinda crunchy (mostly from necessity), mom of 4 incredible kiddos. My husband works so hard to keep this dream a reality. It's not easy. Some days I dream of time alone, time for hobbies, for other adults to talk to, to get to go to the grocery store without reminding my rambunctious offspring not to climb and jump off the palates of flour or hide in the store refrigerators. I digress.

I am thankful for secondhand furniture because even though my burgundy faux leather and olive drab canvas sofas don't match, I can relax and laugh when my 7yr old practices jumping and flipping off them, or when the two year old uses the couch cushions like a slide, when my five yr old builds a fort with the cushions that ends in a dog pile from his brothers. I don't have to frantically run for upholstery cleaners to protect my investment when my baby girl spits up or a diaper change goes awry. These messes get cleaned up after my kiddos have been cared for and when it's convenient.

A wise woman once said, “You CAN have it all, but you can't have it all at the same time.” These choices have also added up to a dream I have held dear since I was a small girl. Other girls dreamed of wedding dresses and Prince Charming. I dreamed of Cowboys, adventure and owning my own farm and the Black Stallion. These dreams gave way before a dream I didn't even know I wanted, being a mom and wife. But I have nurtured my lifelong dream all this time through gardening, making my own food from real ingredients, and any small hobby that reminds me of the old way of doing things. I also live vicariously, through YOU and others like you. And after Eight long years of ugly sofas and carpet that needed replacing six years ago, I am This. Close. to maybe, just maybe purchasing that land, to build that barn, plow a new garden with a cow and have a whole mess of chickens, and be able to turn my kids loose on acres of land where they can run and scream and be as loud as they want without disturbing the neighbors while my husband and I look on while holding hands on the front porch.

So here's to you, Jenna, and all the falling-apart furniture that represents so much more.

~Erin


Garden Update May 2016

Nasturtium = Best filler plant ever.

My two Amish Pie pumpkins beginning to take off. Proof positive for melon pits. Thanks David the Good!

Peaches, Pole Beans, Black Krim Tomato

Florida Highbush Eggplant, Purslane, Pumpkin

My original garden doing quite well with (clockwise) tomatoes, collards, sunflower, broccoli, nasturtium, tomato, pepper, strawberry, blueberry, tomato, cucumber and my beans in the pot on the right.

The whole shebang.

Giant pumpkin leaves.

My newest garden box, double dug, partially trench composted, and currently planted with bio-accumulators: BOS Sunflowers, Burgundy Amaranth, and a Porterweed (not shown). Because I had them, I planted zinnias and eggplant here also as well as papaya, and sweet potato. Once the sunflowers and amaranth get bigger, I'll plant some bush acre peas also.

A tiny mulberry, oh so tasty.

Beautiful Broccoli, a giant, but fully edible plant. The hearts of the stalks are delicious!

Come on baby pumpkin!

The pumpkins are going nuts.

My seed grown Valencia Orange. Healthy, happy, and Citrus Greening free as of now.

Moringa

All 25ft of pumpkin plants.

My Floridaprince Peach loaded with its first crop of nearly ripe peaches.

Rattlesnake Pole Beans. These five beans should give me more than enough seeds for next planting.


Happy May All!


Fish Tank Greenhouse

I've been using my little homemade greenhouse for about a month, and I must say…holy cow, it's amazing. I used aluminum foil on the outside of the fish tank, a box with hardware cloth to set the soil block pots on to keep the seedlings close to the lights, and the regular aquarium hood outfitted with cheap compact fluorescent daylight bulbs. It's interesting to see how even though the eggplants and tomatoes all sprouted at different times, they all grew to the same height (distance from the light) and then leafed out. I really wished I still had my fluorescent T5 aquarium hoods from back in my freshwater aquarium days, but the cfl bulbs are doing quite well.

I started eggplants with the most success I've ever had and the tomatoes are short and bushy. Even direct sowing in the garden doesn't yield such excellent results!

I transplanted my eggplant and the four groups of zinnias outside to harden off in the shade two days ago. So far, so good.

You can see how the eggplant roots have really filled out nicely and seem to have been “air pruned” as the people that swear by soil blocking pots claim. I can definitely say transplanting them was a breeze.

The zinnias roots, not so much. They had three inch tap roots coming out of the bottoms of their pots. They didn't seem to mind growing into air at all. So, it may be related to the type of plants you grow. The tomatoes are “air pruned” and we shall see on my other types of plants how it works.

Sadly, I had a zero percent germination rate on my gifted pepper seeds. I know they spent about a week in the hot trunk of a car, and I'm not sure where they were stored before that, but my guess is the viability was destroyed on all the packets I was gifted. Oh well.

I tried my old corn seed next, but the corn didn't sprout either. So I've replanted with squashes, onions, and burgundy amaranth. The bunching onions and amaranth are already sprouting.

I'm loving this little seed starting chamber and would call it a giant success!


A bit more progress

This is what I was left with after the water drained, then I added Black Kow and a bit of peat moss and planted the first orange tree. I moved the sand back in place and carted the rest of the sand off to backfill the hole the boys dug under their swingset.

image

image

I dug another large hole and filled it. With some cardboard and the entire contents of my white compost bin including the unfortunate vermin family living in it. Gross.
I planted my next orange tree and laid black landscape fabric and then mulched.

image

image

I will espalier these orange trees to a trellis and plant squash in front of them and probably sweet potatoes in front of the glass.
And tomorrow I’ll be adding pickets to the sections of 2x4s. It was a good couple days progress.

image

Adding Material to the Melon Pit

I dug my Melon Pit composting hole. It was a good size about 2 x 2 x 3ft deep. In the pit went:

  • Lots of cardboard boxes of all kinds
  • Dry brush and weeds
  • More cardboard
  • 3 small charred partly burnt logs
  • A ratty torn up pair of cotton jeans
  • A dead squirrel
  • Paper
  • Baby wipes
  • A little manure
  • All the food scraps for the last two weeks
  • Top soil with a little peat moss mixed in from a previous planting project

And this is how full the pit is now. To really get the decomposition started I ran the hose for several minutes and filled the pit full of water. It drained out pretty quickly, but now the cardboard will hold on to that water and give earthworms a nice place to live.

Since I don't want to wait to plant a little orange tree for espaliering and my cucurbits seeds, I'm going to finish up the rest of the pit with a bag of Black Kow then top it with weed blocker and leftover mulch from the garden. The sandy dirt I removed will go to backfilling under the boys swing set…again. They are unstoppable with a shovel.

And because you should see something pretty, check out the peach tree. I can't get enough.

Miss Norah naps in a shady spot the garden while we work. I believe in “airing out” the baby. Get that vitamin D! And don't worry, while it is winter every where else in the continental U.S., it's a balmy 83 degrees here, so lightweight summer garb was in order. Norah G. is quite sizable for being 10 weeks old. So squishy!


Melon Pits

In his book Compost Everything, David the Good teaches how to create melon pits as an easy way of getting rid of large amounts of compostable materials while adding some nutrients and water retention power to the soil. Well, I'm ready to give it a try. Some areas of my yard are sandy loam, tending more towards sand, but anywhere near the foundation of the house is sand.


It's a no-plants-land where only hardy draught tolerant natives survive. I had made a little pollinator garden of fire bush, porter weed, horse mint and milkweed to grow along here last year, but I wanted something more polished and that would allow me to use the space for food production. I'm hoping to eventually espalier my orange trees along this west facing wall, but first I need to fix the area up a bit. I pulled out two of the firebushes, the horsemint and porter weed to make room for the oranges. But this area needs some serious amending with something that's got some staying power. You see the rainwater runs off the roof all along the edge right about where the 4 x 4's are. This keeps the garden watered decently through the summer but washes all the nutrients and compost away like it was never there.

Enter melon pits. I believe that the melon pits would be a good way to fix up the soil because there would be things in there slow to decompose like wood and chunks of cardboard and some faster things like food scraps and paper. Anytime I trench compost, earthworms move in and hang around after the scraps are gone, so hopefully a big melon pit will really help fix up the soil more permanently.

I've been collecting a pile of brush and all the cardboard and food scraps to go in here. I'm also gonna add whatever partially broken down material is in my compost bin. I'm hoping to gather a nice heap of stuff before too long so I can start filling.


Seed Starting Inspiration

This post is meant more as an inspiration than a how-to. It is unlikely that you would have the exact same spare materials lying around, but I would encourage you to look at what you do have, and get growing!

image

I converted a 10 gal fish tank and light hood to be my seed starting chamber. I lined the outside of the tank with aluminum foil and in the light housing also. Aluminum foil is not a mirror and not perfectly reflective. But I does reflect some and some is better than none, so I put it on. It also blocks out light to allow the seeds to germinate in a dark environment which some seeds require.

I covered it with a cut ziplock bag (because I was out of plastic cling wrap) to create a humid environment and conserve moisture and to keep out bugs. In the bottom of the tank is about half an inch of water to help with the humidity too.

image

I put a shoe box size plastic storage box in the bottom to raise the seedlings closer to the light source to (hopefully) prevent leggy growth. To create a larger surface for growing, on top of the box I put the 1/2″ hardware cloth that had been a divider in my worm bin. On the hardware cloth went my homemade “soil blocks” which are supposed to be the greatest thing to happen to seed starting since seed starting mix. I like trying out different ways of doing things so I’m giving them a try with my own homemade soil blocker.

This soil mix is about 60% Jiffy Organic seed starting mix and 40% peat moss with a healthy dose of Jobe’s slow release 4-4-4 organic fertilizer mixed in (it smells like hot death; it’s the junk.) I’ve been dithering on what to plant in my garden box because the RKNs have gotten so out of hand that I can’t have a non resistant plant there for two months before the plant’s roots are completely covered in galls. In spite of that, my Ancho Poblano peppers are flourishing and have given me at least a dozen A-mazing peppers. I had planned on ordering more peppers and RKN resistant seed varieties but I recently came into a windfall of pepper seeds of many varieties.

image

My husband’s Aunt brought me her school’s student garden leftovers from 2011, and I was quite happy to receive them. The are seeds from the company “Renee’s Garden” who I have heard of but haven’t used before. So far I’m very impressed with their products. The seed packets have detailed starting, cultivating and harvesting info as well as an additional flap on the packet about the specific variety.

And, yes, the seeds are unusual because they are dyed with food dye to indicate different colors or varieties within the packet which is something home gardeners will find very useful. Most of the pepper seed packets had more than one color or variety in the packet, something that could save you from having to buy multiple packets to get different varieties. I wrote out a list of what is planted where so I don’t forget.

image

Since the seeds were from 2011, I planted three seeds per pot instead of my usual one; seed viability usually decreases over time from the initial 98% viability at the time of purchase.

image

I’m keeping the peppers in my utility closet which stays quite warm and has proven effective at sprouting peppers before. Fingers crossed I’ll be planting out a bunch of pepper plants in the next month!

Vermicomposting, Ch4: The Lazy Harvest

It’s been almost a year since I’ve posted about my Vermicomposting experience, so I think it’s time for an update. My little bin has been chugging along nicely and doing quite well. It’s simple, and has been almost fool proof. Over the last year, I’ve made several small harvests and two large harvests of vermicompost from my kitchen bin. The small harvests were because I needed to make some compost tea to fertilize plants, and the large ones were because the worms had converted 90% of their bedding and food into castings. The most recent harvest I made didn’t go as well because I had less fresh bedding available than I realized when I began harvesting. You see, when I set up the bin about a year and a half ago, I had been saving shredded paper for months knowing I’d be setting up a worm bin. I was also able to collect a bag full of crunchy fall leaves and had a starter supply of food ready to go. All that took up about two thirds of the bin and was for only about 10 worms and some cocoons.

When I made the first big harvest six months later, I had a bucket of dried grass clippings and more shredded paper and such ready to go and mixed that with their old unfinished bedding/compost. The worm population had really grown from just those ten worms and I had about two handfuls of worms in the bin.

Well I have learned that few good things on the planet breed like worms. My population of worms is now huge. It’s now so big that the last small harvests I’ve made, I didn’t give too much care to separate all the worms from the finished compost and just mixed them right on in with the peat moss and soil I was adding the compost to for new plantings. Unfortunately, I didn’t have near the amount of bedding my colony now requires. My little bin was only about a quarter full with the new bedding of mostly shredded paper and cardboard mixed in. I soon learned this was a mistake.

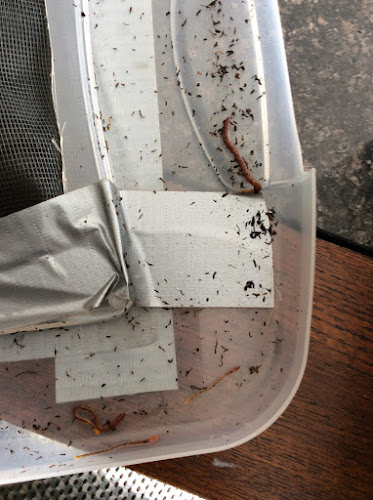
You see over the next month, the worms began a massive exodus from their bin in search of a better home. I thought at first they were fleeing from something in the new bedding, but then I realized that the bedding was jam packed full of worms and some of the largest worms were simply looking for more space.

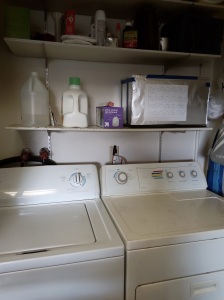
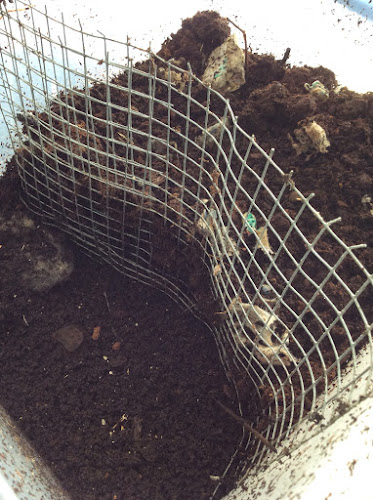
It galled me to think of buying bedding for them, but, eventually, that’s what I ended up doing. Lucky for them, I needed a bale of peat moss for my blueberry bushes and to amend my garden, so I came up with a plan to move worms from old bedding to new with the least amount of effort. I used a small garden hand rake to quickly sort the unfinished bedding from the finished, but didn’t give too much concern at separating the worms from the bedding. Most ran down into the finished castings and away from the light as I sorted and that was good enough for me. I then scooched all the finished compost to one side of the bin and folded a piece of 1/2″ hardware cloth around that part of the bin to keep the castings separate from the new bedding. I mixed up the new peat moss with old water from my fish tank till it was a nice consistency for the worms and put it and some favorite foods (namely banana peels) in the other side of the bin along with a small gob of worms that I’d sorted off from the unfinished old bedding.

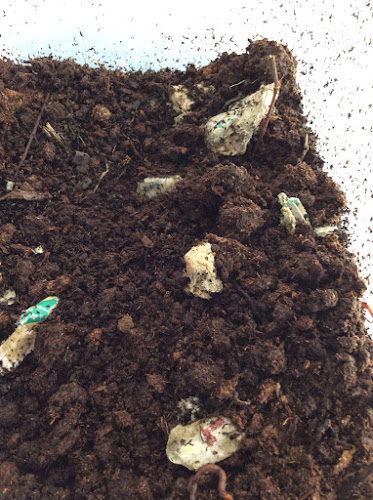
New peat moss bedding

Then I put the lid on and waited for the worms to migrate from their finished side of the bin to the new side of the bin. I put a light on over the bin for a couple days to encourage them to stay in their home and not go galavanting. I’ve read worms can become a tad disoriented from a big overhaul like this one and their aversion to light can be used to contain them until they acclimate.
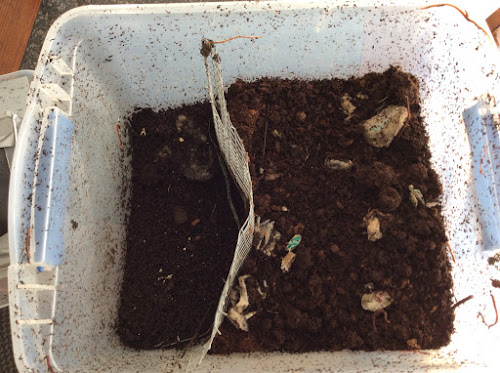
The divided bin

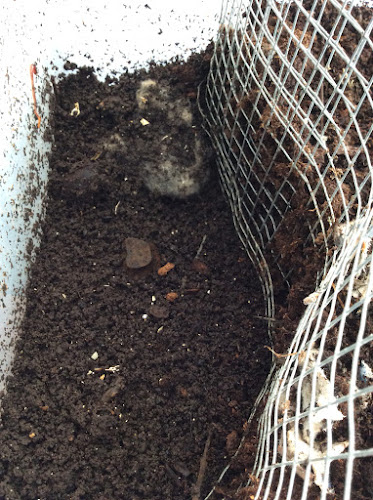
It’s been two weeks at least since I did all that. I’ve been monitoring the water content of the peat moss which is very dry stuff and I did have to add more water to several times to get it to optimal level. I’ve also been poking around both sides of the bin to see where the majority of the worms seem to be.

Ready to harvest

Today I had the easy pleasure of harvesting the rest of the finished vermicompost. All I did was scoop the finished stuff out with my shovel and hand picked a dozen stragglers out of it. Easy as pie. I then pulled out the hardware cloth and filled up the bin the rest of the way with more wetted peat moss.

Finished vermicompost

Letting the worms do the traveling from one side of the bin to the other was by far the easiest way to harvest vermicompost. In the future, all I will do is scooch the fished stuff worms and all to one side, insert hardware cloth, add new bedding, harvest two weeks later. It’s fast and easy and saves the worms and owner from the irritation of dumping and sorting.