While shopping for necessities for our new little boy Wyatt, I discovered that target only offered one style of contoured changing pad cover. The colors were limited to blue or green and it was made of fleece. I had my heart set on something in terrycloth because it is so much more absorbent and easier to keep clean. Not only was I disappointed, at not getting what I wanted, the fleece cover cost around $10. With all the other necessities, this was more than I wanted to spend. So, I decided to make one instead.
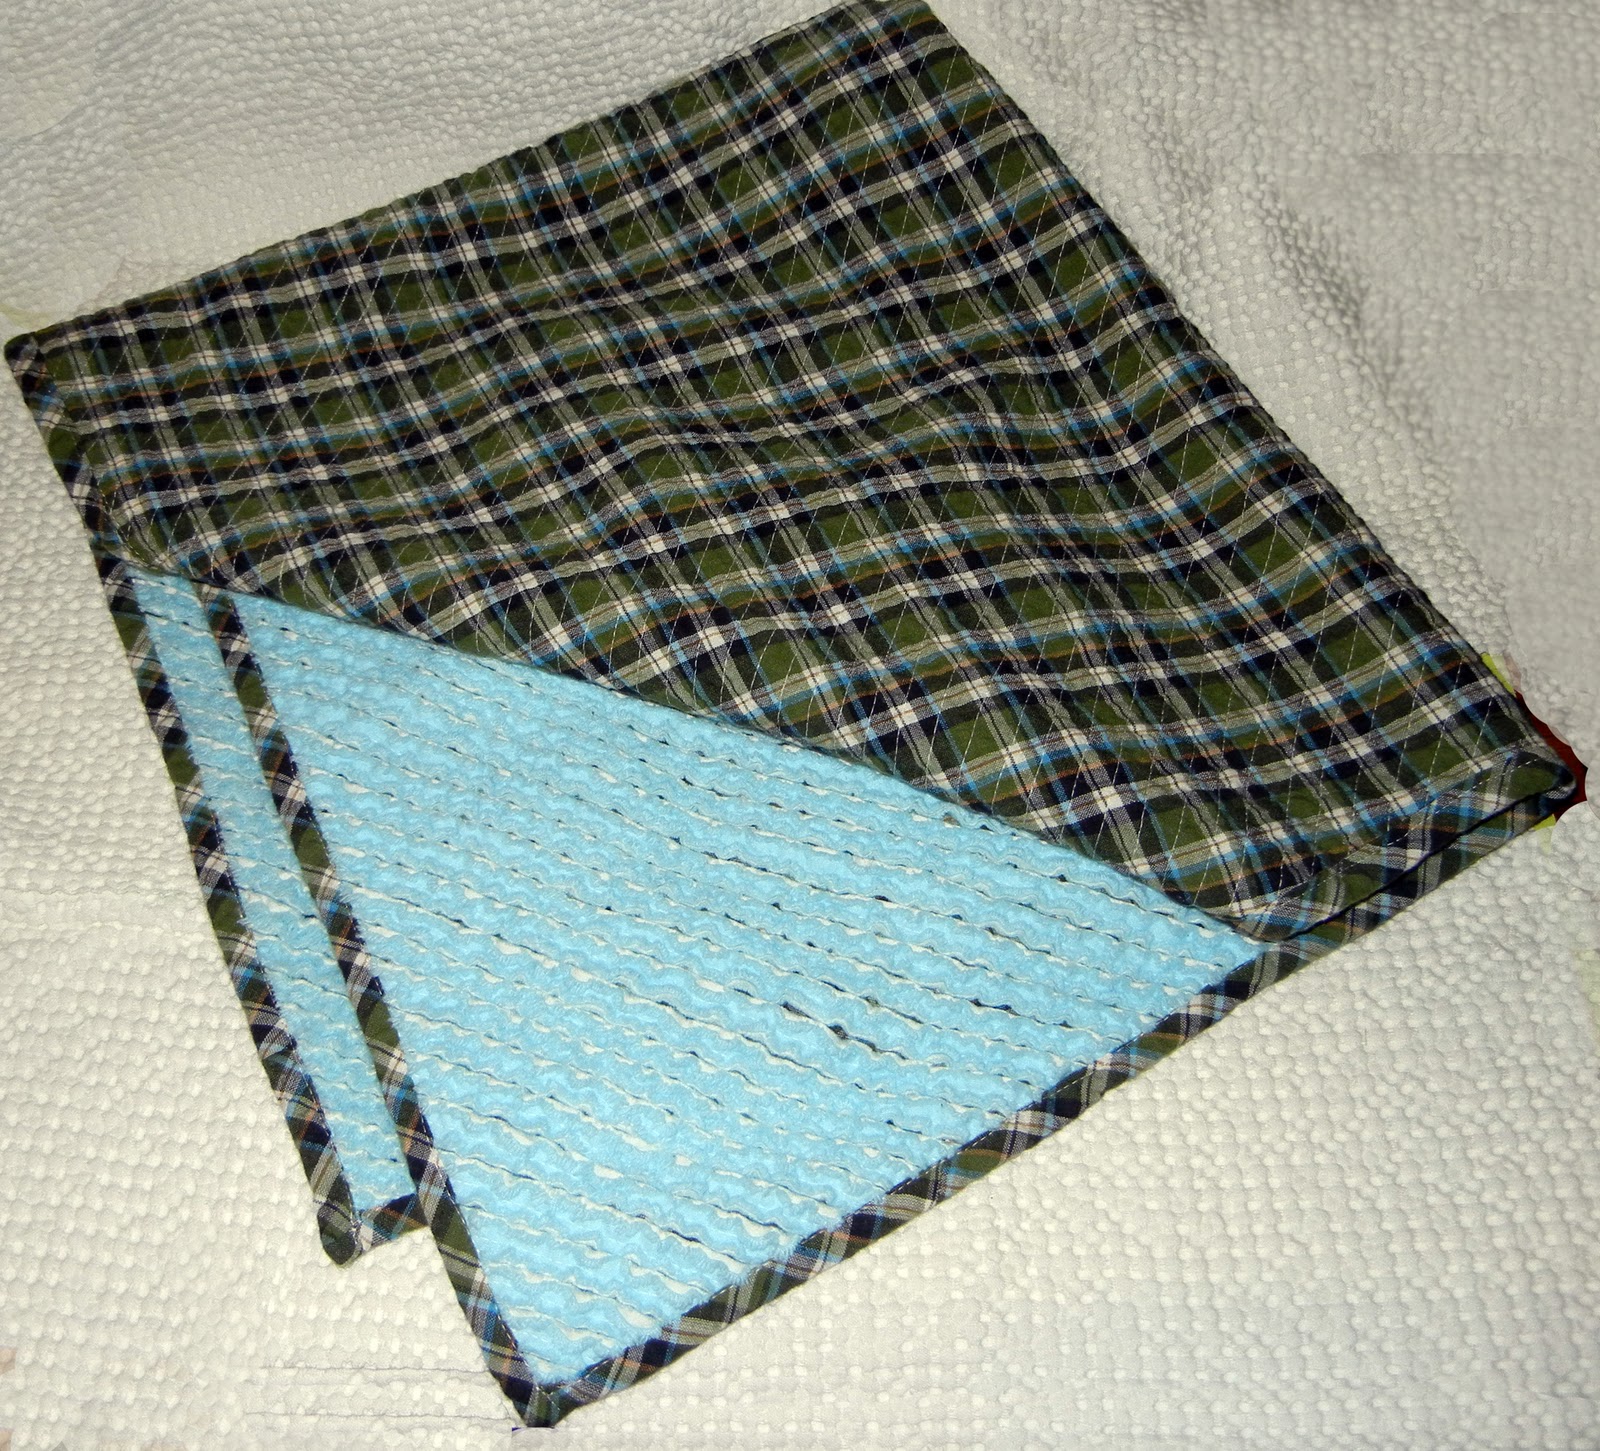
And here’s the result!!!


Not too bad! It was a naptime length project, and very easy.
Here’s How I made it:
I started out with a remnant of tan and green checked homespun* fabric (about 50 cent) and a pre-washed white towel ($2.50 from walmart). I also used 60″ of 1/4″ or 1/2″ elastic to keep the cover in place (use whatever you have on hand).
For the Terry Cloth top:
To use the dimensions of your own changing pad, measure the length of the top of the changing pad, and the width folowing the contours of the top. Add a 1″ to each measurement to allow for the seams. My measurements came out to 18″ x 32″ including the seam allowance. Cut a rectangle with those measurements out of the center of your towel. This will be your terry cloth top.
For the Fabric Sides:
You will need 2 long sides and 2 contoured sides.
For the Long sides use the length measurement from the terry cloth pad (including seam allowance) and measure the height of the changing pad. (Measurements were 4″ x 32″) To the height measurement, add 4″ so that the sides wrap under the changing pad and you have enough room to make a casing for the elastic (see 3rd picture). So, I cut two 8″ x 32″ of my cotton fabric.
For the Contoured sides: I grabbed a roll of wrapping paper (my preferred pattern making paper), stood the changing pad up on one of its contoured ends and traced the outline onto the wrapping paper. I then sketched 1/2″ seam allowance around the height sides and contoured sides and added 4″ to the bottom side as I did for the long side above. Cut out the pattern, and use it to cut out two of the contoured sides from your fabric.
Now you’re ready for Assembly!
There are a couple of ways to do this, so I’ll tell you what I did, but go with what seams easiest for you.
With a long straight stitch and the 1/2″ seam allowance, sew the long fabric sides (right sides facing each other) to the long sides of the terry cloth top.
Next (in the same way), take the contoured sides and sew them to the terry cloth. You can either free hand this adjusting and following the contoured edge as you go, or you can pin the terry cloth to the contoured edge, being careful to follow the curve of the fabric edge. I prefer to free hand it.
All four sides should now be attached to edges of your terry cloth top.
Now, make it square by sewing the fabric height edges together. I started from the terry cloth corner and sewed down. Use your 1/2″ seam allowance and a straight stitch. Do this for all four corners.
You should now have everything sewn together and just need to finish your edges.and make the casing for the elastic.
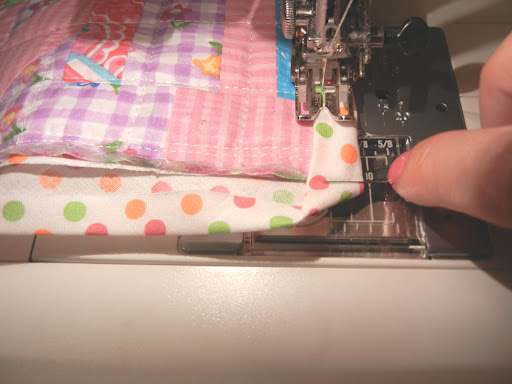
Set your sewing machine to a zig zag stitch and sew along all your unfinished edges (including the bottom edge where the elastic will go. Overcast the edges of the fabric a bit to make a finished edge or you can use a serger.
To make the casing, fold the bottom edge under (wrong sides together) a 1/2″ if you’re using 1/4″ elastic, or fold it under 3/4″ if you’re using 1/2″ elastic. Using a long straight stitch, sew close to your unfinished edge all the way around the bottom. Do not overlap your stitches when you get to back to your starting spot, but leave a 1″ to 2″ opening to insert your elastic. Insert the elastic through the whole casing then overlap the edges and sew together. Sew the 1″ casing opening closed.
And you’re all done!


 .
.