LTTSA Juggling Balls and Drawstring Bag

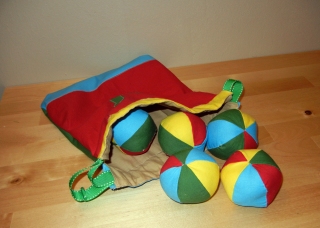
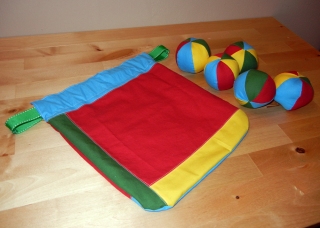
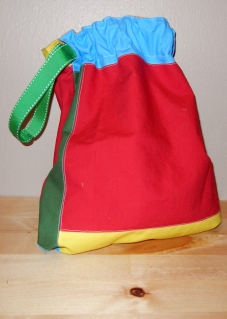
This month I picked out the Juggling Balls and Bag patterns from our LTTSA instead of the playtown. I know my boys very well and they’d much rather throw something than sit and play nicely. Which is why I didn’t fill the juggling balls with dried beans or rice to give them a nice weight for juggling, but just stuffed em full of fiberfil. Now they don’t hurt to chuck at someone 🙂

Anyway,
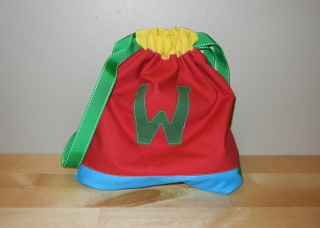
In the spirit of scrappiness that’s been floating around blogdom lately, I felt it absolutely necessary to make this set from my leftover primary scraps from my scalloped quilt in Curves Class. 

Hence the fun quilty look on the bag. I used the lining to make the outer and inner pieces of the bag and edge stitched all of my seams. The ball size I went with was the larger 3″ diameter.

And of course, Since this is a birthday present for my baby (how the heck is he almost 1yr old already!!!), I had to throw a quick monogram on the bag. I saved the letter from making this and am now glad I did.

I really couldn’t be happier with how this project came out. The pictures don’t really do it justice because you can’t see how nice and sturdy the bag feels or how cool the grossgrain ribbon looks as the handles. Pictures do, however, hide my atrocious handstitching job on the balls.
I’ve really been diggin’ the primary colors lately. More fun pics to come of what else has gotten primary-ed. Like my bathroom re-accessorizing!
LTTSA: Cozy Hood

Fabrics:
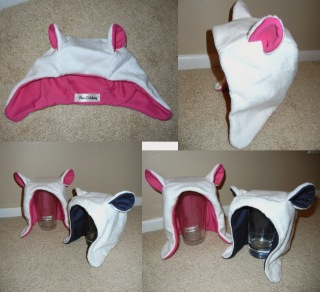
I used a slightly stretchy, lightweight, super soft, white fur for my outer layer. My lining was a navy blue soft knit for my boys hats, and a thin kinda shiny bright pink knit for little girls Christmas present.
This would be a great project to recycle old jersey shirts for linings and sweaters or fleece hoodies for the outer layer. If you do use a knit, be sure to check the tension settings and stitch width on your machine. The slippery knits like my pink one, are a pain to work with and may not feed pefectly. Be sure not to pull on the fabrics while you’re sewing with them.

Cut Your Pieces:
If you do use a fur, pay attention to the grain of the fur, which may not be the same as the grain of the fabric. Decide how you want your fur to lay as a finished product before you start cutting.

Step 1:
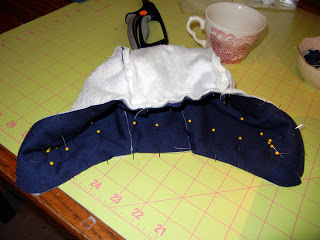
Pin and sew your ears. I went ahead and pinned my linings too and worked my hats assembly line style. Don’t forget to leave a 2-3″ opening in the seam of your lining for turning (I forgot on all 3 hats).


Step 4: Sew side panels to the center hood piece. I found it helpful to pin with the side panel facing me, then flip it over and sew with the center hood piece facing up. It kept my pieces from wrinkling.

Step 5: Pin and sew your lining to your hood with right sides together. Flip right side out.
Step 6: Blind stitch the turning hole in your lining closed.
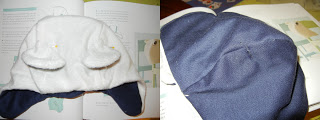
Step 7: Fold your ears forward along the seam, and Bartac them in place. I did this on my machine and changed my bobbin thread to match the lining. The further up the ear you tack, the more your ear will stand up: 1/2″ worked well for me. 
 
Then admire your work! I chose to leave off the ribbons, because I know they would cause my children nothing but fuss. The pink hat is a size small and the blue is an extra small. The hats run a tad large, but still stay on just fine. With a thicker fabric, it probably wouldn’t be noticeable.
 Redding wanted to try on brother’s hood 🙂

Too Cute!

Bias Trimmed Apron

I Loved making this apron! It was a breeze! And I learned a few new and important skills: How to make and Use Bias Tape Correctly, and How to make a French Seam. I’ve been dallying about making bias tape. It has always seemed so daunting. Hours of folding and pressing and refolding and repressing…. Just for a few measly yards to make a quilt. But Now! I learned about the nifty little bias tape maker helper, and how to make it with only sewing 2 seams! That was the best. I gotta tell you, I loved the Prudent Baby method our fearless leader Jessica suggested as requiring way less sewing. It was great! While sewing isn’t something I despise (obviously), it was much nicer to get to watch tv whilst I spent 95% of the time pressing and cutting the tape.
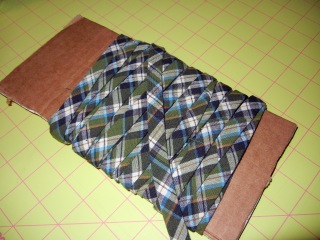
And Here’s My Bias Trim Tape!

I used a half a yard of this great Green, Grey, Navy, and Blue Plaid Homespun Cotton fabric that has been staring me in the face for months now. I always pick it up, unroll it, look at it (even prewashed it) and put it back on the shelf. And now I used it! On the other hand, while it looks really cute, I don’t really recommend using Homespun Cotton because it doesn’t hold a crease well. Now I love it and plan on using it for several other projects soon, but it isn’t crisp like quilting cotton if that’s what you’re looking for in your bias tape.

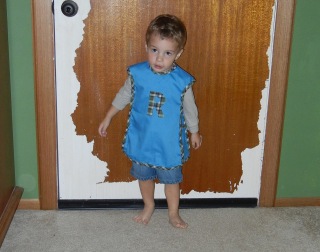
I appliqued an “R” to the front of the smock since it is just a matching solid blue fabric, in an attempt to make it more boyish. I’m not sure it helped. It still looks like a dress to me (and Alan, who wasn’t thrilled with Redding running around with “a dress” on all day) Hehe.

 
But Redding loves it! He has worn it almost all day and likes the pockets on the sides. The fit is Perfect, which surprised me for some reason because most things I make don’t have such a nice fit.
We plan on wearing it for sidewalk chalk, fingerpaints, gardening, and cooking. I might have to make one for me too 🙂 I’m very messy.

I’m really looking forward to this month’s project (I’ll be making the Cozy Winter Hood) and will probably make one for each of my boys, and several for Christmas gifts.

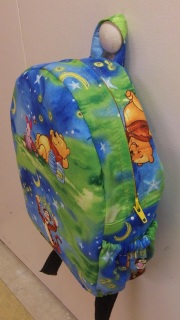
Redding’s Backpack

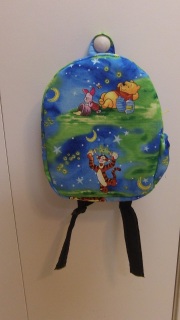
Here it is! Redding’s LTTS Backpack.

I used the lining pieces to make one solid front instead of the pieced front. I scavenged the zipper from an old american eagle sweatshirt that Alan doesn’t wear anymore. It was the perfect color yellow for the backpack and I saved some dinero.

I added a pocket in the inside and one on the outside. Redding’s not sure what he thinks about it yet, but once we throw some toys and books in there, I’m sure he’ll love it 🙂 He’s attempting to destroy life on earth right now, so I’ll be back with some more action shots later.

Project updates and Book Shelf Organization

Been Busy today taking my kiddo to the park to play in the fountain, hitting up the library, visiting family, cleaning, and 2nd best of all! Working on the LTTSA backpack! Have I ever mentioned that I hate cutting out patterns and pieces? It’s my least favorite part of the sewing experience. Fabric shopping might be my favorite, sewing second–if given a choice, I’d even rip apart a messed up seam and re-sew it before cutting out pieces. Anyways…. It’s allllll done! The pieces are cut (except the interfacing b/c I don’t know how much I want to use yet) and waiting for attention! I made a couple changes to the pattern and added/subtracted some things to the pattern. Like pockets on each side and making the front one complete piece without a seam and without pockets. I’m also using quilting cotton and flannel instead of a sturdier fabric. Hence the indecision about interfacing. So tomorrow, hopefully, me and the machine have a date 🙂

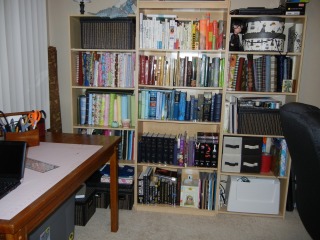
Next: Some long awaited pics of my new sewing room. But only the bookshelves.

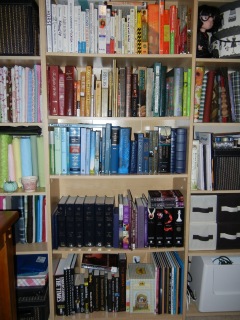
Look at the organization! It’s delish. My books are all in the middle with fabric and sewing boxes and random craftiness on the sides. I still have to clean off the tops of the shelves and decorate, and the closet needs attention, but 80% done is goooood.

Here are my Rainbow organized books! I stole this idea from my sister’s roommate who has awesome bookcase organizing techniques as well as kick butt spinach artichoke dip. No lie.
I thought about organizing by author or genre, but it’s a really mixed bunch and in this small of a room, it would just look like chaos, so color was the choice! And I’m a fan.

These shelves of fabric goodness are displayed on rectangle cut pieces of cardboard boxes. It is easy to see all my fabrics and somehow I can fit much more into the tiny space. Not that I’m sure you can call four rows of bookshelves, a scrap box, a remnant box (top left shelf), a 55gal bucket with faux fur, and another box of felt a “tiny” space, but you get the idea.

Do you like my vintage tea cup? I use it to hold all my straight pins. It’s easy to get into, and not too easy to knock over. I love it. The red toile pattern is so pretty.

Now it’s time for a good book, a cup of hot tea, and to throw my sour dough loaf into the oven. It should have risen by now. Then bed, bed, bed.

 Goodnight, my someone, goodnight 🙂

Wyatt’s Bucket Hat

Coming in just under the wire on this one 🙂 Sewing the hat up as we speak.
My reason? I’m officially in my new sewing room/office tonight! Using it for the first time, and loving my peace, quiet, and organization! It’s a beautiful thing.
Pics of the hat(s) and my new sewing room on the way!

…………………………………….

And here they are!!!

We used Wyatt’s hat at the park the next day and he loved it! It worked great at keeping the sun out of his face and Redding thought it was very silly 🙂
I really like how lightweight it is. I used good ole Walmart cotton camo print and solid black fabrics with medium weight iron-on interfacing. It provided a good amount of shade without making Wyatt hot like some of his other hats do.

 A note on the construction:
I realized that for this project, cutting with the grain of the fabric does make a difference. My camo fabric was a scrap left over from Redding’s Fourth of July pants last year, and I squeezed the pieces onto the fabric however I could to make them fit. When I was piecing the side and top together, you have to cut notches into the side to make it fit the top. Because I didn’t follow the grain, I got some funny stretching action, and a couple wrinkles while sewing. Nothing too obvious, but noticeable nonetheless.

I followed the grain when cutting out the black fabric for the inside of the hat and I had a much easier time piecing it together.

He has some room to grow in it which is great. Now I just have to make Redding one, and then all my boys will have matching hats. Alan has the real deal that he got at boot camp years ago. I might sew some molle loops on Redding’s hat to make it look more like Alan’s.

I loved sewing up this pattern. It was wonderful. The books instructions were very clear and made perfect sense. I only changed the sewing-by-hand part to sewing on the machine. Twas easy. 
Looking forward to the backpack this month!